
Blog > SAVED BY MG: We All Love A Before and After…
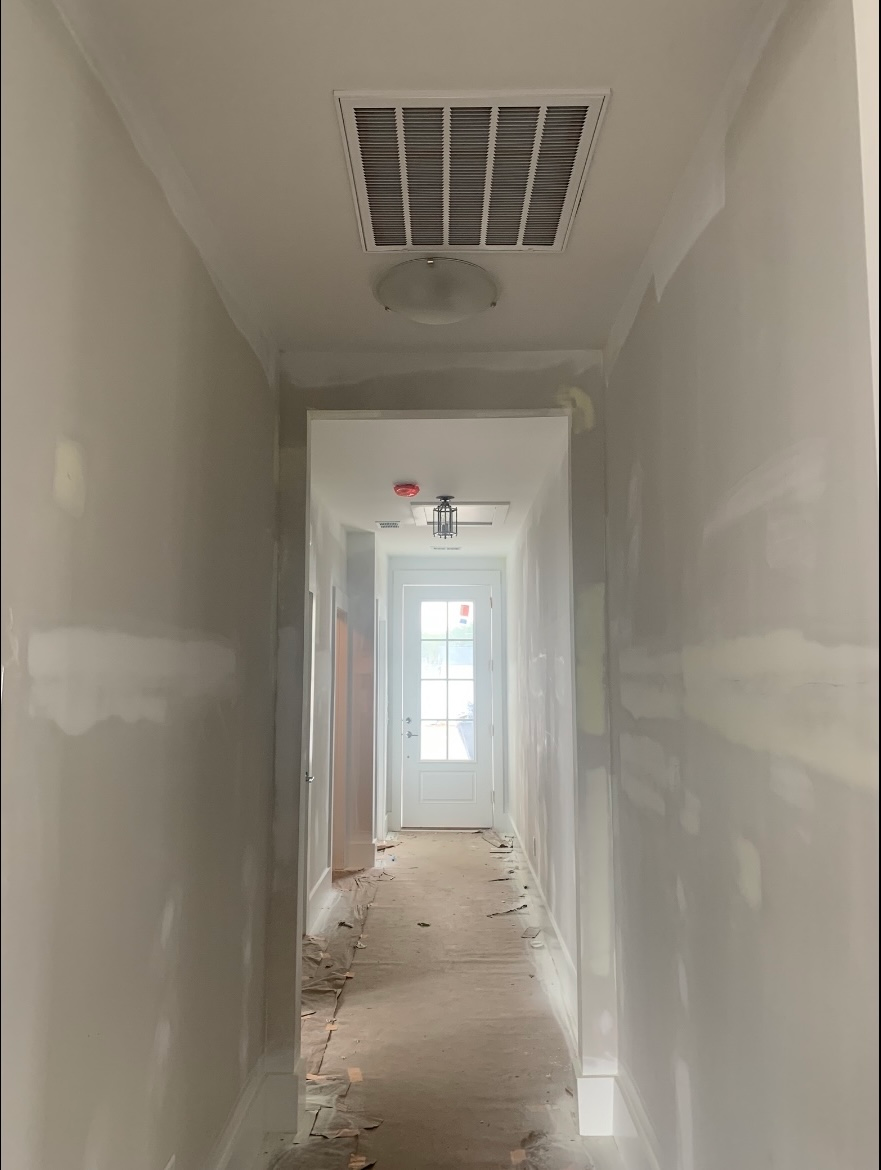
A newly constructed home means a blank canvas in my eyes– bring on the DIY projects!
I am a big DIYer. Painting a wall? Hanging trim? Refurbishing furniture? I mean how hard could it be? I’m going to take you through the highlights of my first time ever hanging wainscoting in my home.
Since the front door opens into a long light gray hallway (boring), I decided I would start there. My goal was to dress it up with a nice cool accent color and trim work. The first crucial step when taking on a project like this is planning. This includes calculating the heights, widths, and spacing of the boxes for the trim work. Once I calculated the measurements, I made tick marks on the wall to ensure I was satisfied with the measurements.
A lot of taping and painting later… Viola! Additionally, I added the first piece of trim that would be used as a divider between the colors. Not too shabby.

I saved the best for last– hanging the boxes! The tools I used to hang the trim pieces were: miter saw, nail gun, laser level, caulk. I made all the cuts first then used a spray gun to paint the trim. Next, I leveled and nailed those bad boys in. Then I caulked every side of the trim pieces for a nice clean finish.
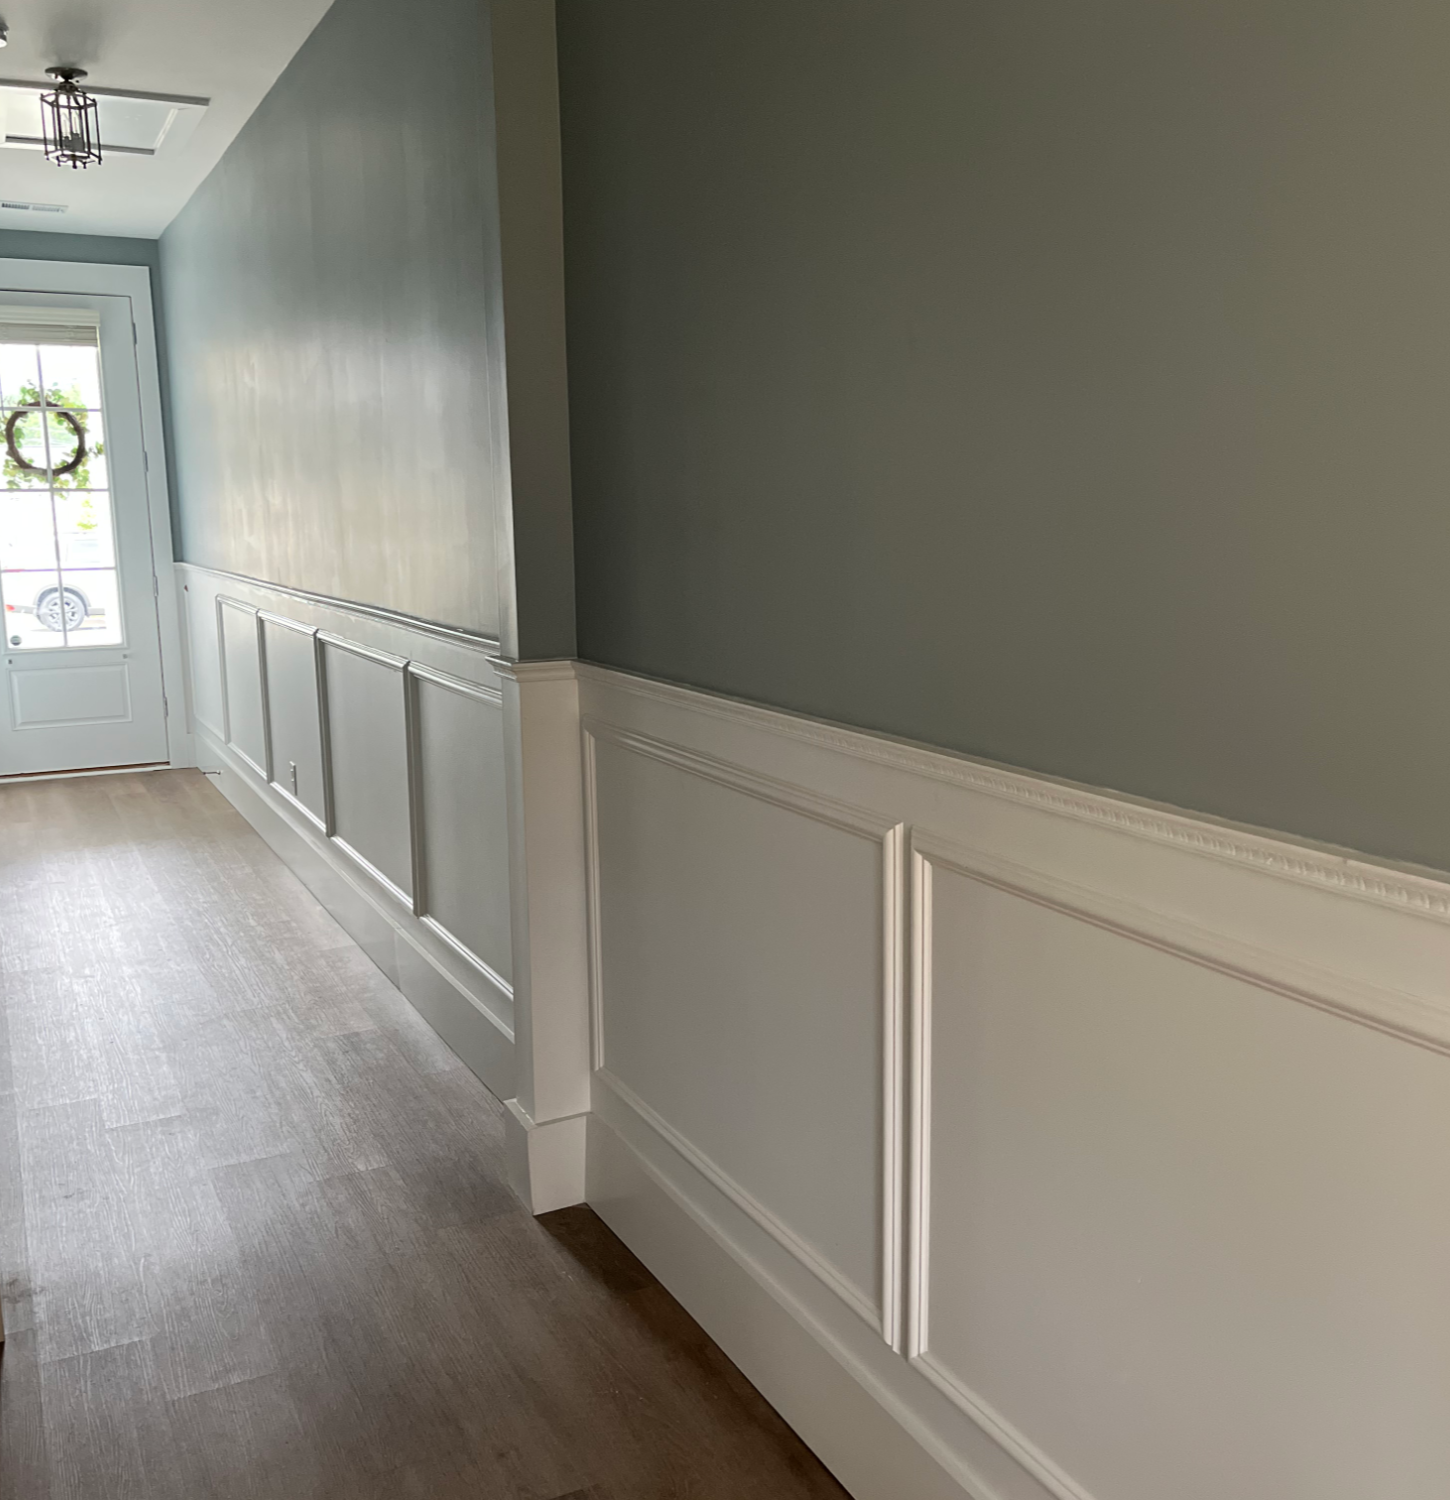
Keep in mind, this was the first time I had ever done anything like this before. So is it 100% perfect, yes (completely kidding)! I messed up a lot, but I learned a lot too. You might be thinking, “I’m not comfortable using power tools, I’ve never tried.” Well it’s never too late to try! Jim Rohn said it best, “Trying is risky, but wait till they hand you the bill for not trying.” In addition, there are people like myself who you can reach out to. Let me help you unlock your dream home!
Cheers, MG